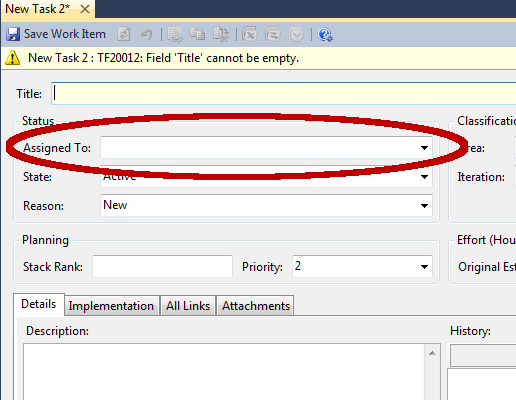
You can customize the Assigned To field on a Visual Studio’s work item type to limit the values for the field to individuals who work on your team.
To do this, export the XML file and modify its content to customize the Assigned To field. Then import the XML file to start to use the updated work item type.
Required Permissions
To perform this procedure you must be a member of the Team Foundation Administrators group or a member of the Project Administrators group for the project.
Customizing the Assigned To Field
- To modify a work item type on a single project, run witadmin exportwitd to export the XML file for the work item type you want to modify.
witadmin exportwitd /collection:[TFS] /p:[ProjectName] /n:[WorkItemType] /f:[FileOut] where: [TFS] = Team Foundation Server URL [ProjectName] = Name of TFS Project [WorkItemType] = The work item type we want to export [FileOut] = The name of the file to output to. note: witadmin can be found in: \Program Files (x86)\Microsoft Visual Studio 10.0\Common7\IDE e.g. witadmin exportwitd /collection:http://mytfs:8080/tfs/mytfs /p:ExampleProject /n:Task /f:C:\Users\TheSoftwareShrink\Desktop\Task.xml - Open the exported file (*.xml) in an editor (e.g. Notepad)
- Find the section within the XML file that describes the Assigned To field (see example below). Notice the VALIDUSER rule that allows for any registered user on the Team Foundation Server as a field value.
<FIELDS> <FIELD name="Assigned To" refname="System.AssignedTo" type="String" reportable="dimension"> <VALIDUSER /> </FIELD> ... </FIELDS> - Change the XML as shown below in the following example. This limits the values of the Assigned To field to the members of the team project’s Contributorsgroup.
<FIELDS> <FIELD name="Assigned To" refname="System.AssignedTo" type="String" syncnamechanges="true" reportable="dimension"> <HELPTEXT>The person currently working on this task</HELPTEXT> <ALLOWEXISTINGVALUE /> <ALLOWEDVALUES expanditems="true" filteritems="excludegroups"> <LISTITEM value="[Project]\Contributors" /> </ALLOWEDVALUES> </FIELD> ... </FIELDS - Save the changes.
- To import the new work item type to a single project, run witadmin importwitd
witadmin importwitd /collection:http://mytfs:8080/tfs/mytfs /p:ExampleProject /f:C:\Users\TheSoftwareShrinkDesktop\Task.xml
Verifying changes imported to a single project
- In Team Explorer, click Refresh to download the latest updates from the server.
These updates include the changes that you just imported. Wait several seconds until the Work Items node is loaded. Nodes that are still loading are labeled working. - Create a new work item using the work item type you modified. To do this, right-click the Work Items node, point to Add Work Item, and then click the Task work item type.
- Select the Assigned To box. Notice that the list of allowed values has changed to include the group of users and values that you specified.
- Click Close to close the new work item. Click No when you are prompted to save the work item.

